
Don’t know how to paint motorcycle plastics and why painting your motorcycle parts is a good idea? Plastic parts of the motorcycle are sensitive, so they require frequent repairing. Painting them is one of the best ideas to give them a new life and a fresh look.
These are shells on bike parts to reduce air drag. The process is different from painting metal parts. You have to remove the previous paint coat and apply the new one to make it look attractive.
It is a fun-filled and easy task if you know how to do it. You can also repaint your bike plastics to style it smartly. Whatever the purpose is, you have to follow the guide to paint it like a pro. Being a motorcycle enthusiast, it is the best thing you can do to add some fun and thrill to your bike riding.
Let’s start!
How to Paint Motorcycle Plastics and Fairings?
Part 1: Cleaning the Fairings:
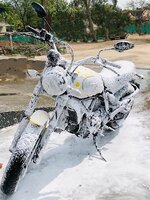
Before you begin with the painting, remember you can’t paint on gunk. You have to do it properly if you want the best results. For that shiny, sleek look, you should clean and sand all the fairings first.
Step 1:
To clean fairings, remove them from the bike by unscrewing all the bolts. And let them rest in any open area. After that, cover your bike so that no spray paint fumes destroy the paint of your bike.
Step 2:
Your bike fairings are not clean because of the black engine gunk. So, to get rid of that dirt, use soapy water. For the soapy water, you will need warm water and dishwashing soap. Mix these ingredients well and use a sponge for washing off the dirt from your bike fairings. On stubborn marks, try continuous circular motions. Once you are done with scrubbing, rinse every part with clean water.
There is one more thing to consider. There must be some stickers on the fairings of your bike. If you want to remove them for better cleaning and painting, use a hairdryer. The heat will help those stickers to leave their place. Remove them quickly after that.
Step 3:
It’s time to start sanding once you are done with washing and sticker removal. Use sandpaper from scratch or buy 400grit one from any nearby hardware store. Now, you have to apply good pressure while rubbing sandpaper in circular motions on the fairings.
The thing you have to focus on is to cover the entire surface. If you leave any spot, it will be prominent after the paint. Therefore, do the sanding carefully on every fairing. To sand the surface of the fairing, you need to balance the pressure correctly. Too rigid and too light motions won’t work well. Smoother fairings are easy to handle and paint. Moreover, they will look perfect after the paint.
Step 4:
Time to get rid of the dust buildup from the fairings. When you do sanding, the dust covers the surface of these parts. It is essential to clear the dust for smooth painting results.
You can use a water-dipped cloth to clean the surface and rinse every aspect properly. Now, leave those parts to dry and take a break while it dries. Have a cup of tea or coffee.
Part 2: Painting the Fairings:
Step 1:
You should start with a primer coating. A coat of primer will make it look shiny and smooth. But, if you don’t have a primer, no worries. You can get it from any nearby store. The best thing you can do to your bike’s plastic fairings is the usage of primer.
Use the primer correctly to cover the entire surface of the fairings. Don’t leave any spot as the primer coat is the secret behind a perfect painted look. Keep spraying until the fairings are covered perfectly with primer.
Don’t forget you need a consistent layer. You can’t stop during the spray process or, else, it will leave patches of primer on the surface. Allow those parts to rest for about 3-6 hours until they are completely dried.
Step 2:
Time to start painting. The base color should cover the entire part so that no place is left. Spray a thin coat of the base color over the whole area. It will help the topcoat to shine with perfection. Parts will take 6 hours to dry.
It is vital to dry all the pieces before you go with the next step. This initial painting will cause fumes to enter your nose and mouth, resulting in nausea, vomiting, headache, etc. Use face masks and goggles to prevent this situation.
Step 3:
It’s time to do sanding again. At the beginning of the process, we did dry sanding, but now we will do wet sanding. By wet sanding, we mean using sandpaper on the already wet surface. Rub the damp cloth on the fairing surface and start sanding with the sandpaper.
Unlike the dry sanding step, use 1000 grit sandpaper to perform the task. After this, dry the surface with the help of a dry microfiber cloth. This step is to make sure there is no dust and moisture on the surface.
Step 4:
Coat the surface with the second layer of a base color. Even and pleasing base color coat will make it look enhanced and smoother. Wait for about three or more hours to perform the next step. If you want richer and thicker results, in the end, try applying more coats in the same way.
This step is also known as grip coats because every coat improves the previous coat. Don’t forget the last coat should be dried for about 6-8 hours.
Step 5:
Want to secure the paint you have done with all your efforts? Use a clear lacquer for added protection. If you don’t have one, buy it from any hardware store near your house which supplies painting items. Clear lacquer coat provides perfect finishing to the fairings. Do it one-time and spread it evenly with the cloth piece. Once it’s dried, apply more coats.
Step 6:
You are almost there. Leave the bike fairings to dry for about a day. After that, use those bolts of the bike to attach all the fairings again in their place. And, there you go!
What Are the Benefits of Painting Motorcycle Fairings?
Painting your motorcycle fairings is fun and engaging only if you know how to paint motorcycle plastics in many ways. After learning how to paint motorcycle plastics, you should know about the benefits of this process to get yourself convinced.
- You will learn a new skill of painting plastic parts, and you will get a chance to know everything about how to paint motorcycle plastics.
- You may get remarkable results at the end of your first attempt. This will encourage you to do it again. Moreover, you will be amazed to see such a trendy look on your bike.
- This cost-friendly option will save a lot of your money, which means you are working on a great deal.
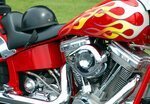
- It is an ideal way to enhance your creativity. You can paint your bike in whatever way you want. Add your favorite colors and give it a customized look.
- For some people, it feels so relaxing, if it’s their passion. It works as a kind of therapy to provide you with peace and satisfaction.
Can I Paint A Dirt Bike Plastic? Is It A Good Idea?
Painting your bike fairings is always a good idea, even if it is about dirty bike plastics. You can perform painting dirt bike plastics easily by following the step-by-step guide we have mentioned above. The process will end up with a smoother and finished look.
This way, you can paint your bike fairings in a customized way, as well. Painting dirt bike plastics can turn out bad if you don’t use the right paint. They’re sensitive because of their exposure to mud and water more than a street bike. Only suitable paints with unique shades will work here.
Common Problems If You Don’t know How To Paint Motorcycle Plastics
Fisheyes:
When there is a layer of grease or oil on the plastic surface, the primer or paint coats will end up having fisheyes. These are circular spots that might appear over the surface after the coat is applied. Clean the grease or oil layer before using a primer to prevent fisheyes.
Wrinkling:
If you apply your coats too quickly or too late, you will notice wrinkling. It is a reaction of the old finish to your new finish enamel, possibly.
Crow’s Feet:
Using a blowgun to dry coats, not waiting enough for the next coat applying, applying too thick coats, etc., can result in cracks on the topcoats.
Orange Peel:
You may notice a kind of orange peel when you don’t use enough pressure while sanding.
FAQ
What Type of Paint Will Stick to The Plastic?
You can use any automotive paint to paint your bike plastics. But you should use good quality and mix flex agents before applying. You can also go for adhesion promoter spray on such parts.
What Is A Good Primer for Plastic?
There are many excellent and effective primers for plastics. Some of them are Krylon Ultraflat Primer, Army Painter Primer, Testors Enamel Primer, Rust-oleum Automotive Primer, and more. You can buy any of these for fantastic bike fairings paint.
What Is Good Spray Paint for Plastic?
The ones supplying excellent primers for plastics are also offering incredible spray paints for bike plastics. If you want to use the best one, choose from these: Thompsons spray paint, rust oleum spray paint, Plastic dip spray paint, Dupli spray color paint.
Does Acrylic Paint Stay on Plastic?
Acrylic paint can’t last on plastic materials because it is not made for it. For plastics, there are enamel and oil paints. Acrylic paint will peel off because it can’t adhere to the surface properly.
Conclusion
It is fun to change the look of your bike. It can be according to your preferences as a personality as a bike rider. Painting bike fairings are the easy and most impressive way to make your bike look new.
Don’t miss a chance to use vivid colors, especially when you are doing it with your dirt bike because its plastics are color sensitive. We have mentioned every basic about how to paint motorcycle plastics to paint them yourself anywhere, anytime.
Quick answer
How To Paint Motorcycle Plastics and Fairings?: Here’s the short version: identify the likely cause(s), confirm with a simple check, then fix the easiest/highest-probability items first. If the issue affects braking, steering, tires, or fuel leaks, stop riding and inspect before the next ride.
Key questions (so you don’t waste time)
- Primary query: How To Paint Motorcycle Plastics and Fairings?
- What tools/parts do you need before you start?
- What are the common failure points and how do you avoid them?
- How do you verify the fix worked (test/inspection checklist)?
At-a-glance guide
| Best first check | Tires/brakes/obvious leaks/loose fasteners |
| Best second check | Drive system tension/condition + electrical/battery |
| Stop riding if | Brake issues, steering wobble, tire damage, fuel leaks |
Step-by-step (practical)
- Confirm the symptom: reproduce it safely and note when it happens (cold/hot, RPM, speed, bumps, braking).
- Do the quick checks first: tire pressure/condition, chain/belt tension (if applicable), obvious leaks, loose fasteners, battery terminals.
- Isolate one variable: change one thing at a time (e.g., fuel, load, settings) and retest.
- Fix in a safe order: address safety-critical items first (brakes/tires/steering), then reliability items (charging/fueling), then comfort/noise.
- Verify: short test ride + post-ride inspection.
Checklist
- Tires: pressure, tread, age/cracks, punctures
- Brakes: lever feel, pad thickness, rotor condition, fluid level/leaks
- Drive: chain slack + lubrication (or belt condition)
- Controls: throttle free play, clutch free play, cable routing
- Electrical: battery voltage, terminals tight, main grounds
- Fluids: oil level, coolant (if liquid-cooled), fuel smell/leaks
Common mistakes
- Chasing “rare” causes first instead of checking the basics.
- Changing multiple things at once (you lose the diagnosis signal).
- Ignoring safety-critical symptoms (wobble, brake fade, fuel leaks).
- Over-tightening fasteners without a torque spec.
FAQ
Can I keep riding if this happens occasionally?
If it affects brakes, steering stability, tire integrity, or you smell fuel, don’t ride until inspected. For minor noise/vibration, do the checklist and monitor for change.
What’s the fastest way to narrow it down?
Reproduce the symptom, note the conditions, then do the “basics” checklist. Fix/confirm one item at a time.
What tools do I need?
At minimum: tire gauge, basic metric sockets/hex keys, flashlight, and a way to measure battery voltage. A service manual helps with torque values.
When should I go to a shop?
If you’re not confident with brakes/tires/steering, if a fix requires specialty tools, or if the symptom persists after basics.
How do I verify the fix?
Short ride close to home, then re-check: leaks, fasteners, tire pressure, brake feel, and that the symptom is gone.
Next steps (related guides)
Content refresh note: this post was updated to add an answer-first summary, a structured checklist, common mistakes, FAQ, and internal links for next steps.