
Wearing the right size helmet can be a lifesaver in case of an accident. When purchasing the motorbike helmet, you must consider two main factors: choosing the helmet style and determining the head shape. Choosing the helmet is not an easy task; you need to select the best one that works well for your head and offers enough protection to your head even in severe impact.
Let’s find out all you need to know about how to measure for a motorbike helmet correctly.
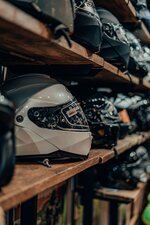
Types of Motorcycle Helmets:
Motorcycle helmets come in different styles and types; some give all-around protection, and others are slimmer ones. There are several types of motorcycle helmets which include the following:
- Open Face Helmets.
- Full Face Helmets.
- Modular Helmets.
- ADV Dual Sport.
- Off-road/dirt Helmets.
Open Face Motorcycle Helmet:

Such motorcycle helmets put your face within the wind and are least protective and merely restrictive. They offer a direct airflow; however, they do not protect the face or the rider’s chin.
Open face helmets are also known as the half helmets covering the skull top or the type of three-quarter helmet, covering the entire thing except the rider’s face. These helmets are less expensive than others. They are short and generally worn by the riders on retros, classics, and cruisers.
Full Face Covering Motorcycle Helmet:
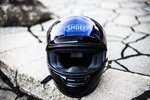
A full face-covering helmet offers complete encasement of the rider’s head. The face shield in this helmet protects the rider’s eyes and nose. It comes with a shell extension known as a chin bar covering the bottom part of the face. Such helmets are less ventilated and offer high protection against the impacts plus foreign elements.
They are one of the quietest types of helmets. If you plan on taking the helmet on the track, full-face covering helmets are the best option.
Modular Helmet:
These are similar to the entire face. They are the subtypes of full-face covering helmets. They come with a hinged property that swings the face shield and chin as soon as the rider suffers from the impact.
Modular helmets allow you to take advantage of both full-face and open-face helmets. They are convenient due to their high weight. They are, however, improving over time.
ADV Motorcycle Helmet:

It combines the features of street and dirt helmets. It is a type of hybrid design that works well as a versatile type. ADV helmets are excellent for adventurous buyers. The street’s transition over the track in one ride allows the ADV helmets to serve well with combined features.
In the street, such helmets offer protection, safety, and work as face shields. When riding in the dirt, they work well as dirt helmets. They come with ventilation and provide good compatibility with the goggles.
Off-Road or Dirt Helmets:
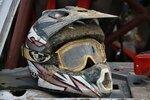
The dirt helmets are for riding off-road. These helmets lack any DOT or department of transportation rating, which means they are not street-legal. They have plenty of airflows, so the riders might suffer from dirt in their eyes. It is best advised to wear it with goggles. They are incredibly lightweight.
How to measure for a motorbike helmet
Wearing the right helmet can save you from a fatal head injury. Therefore, it’s critical to measure the right size motorcycle helmet. Hopefully, with the list of several helmet types on the market, one of them will fit well for your head shape and size. Now once you know the types, let’s figure out the shape of your head.
Identify the Head Shape
People usually come with three different head shapes ranging from long oval, moderately oval, or round oval. You can check the head shape from a photo, and once you look at it, you’ll identify the shape. But choose the picture where your hair is as flatten as possible. The most famous head shape is the intermediate oval type within the US. Now select the helmets based on the head shape.
Finding the head shape and size is more difficult to identify than the shirt size, waist size, shoes, etc. Just ask a friend to use an inch tape for measuring the circumference of your head. The tape moves from above the eyebrows to all over the back head. Then use a string piece and place the string against the ruler to find out the exact length.
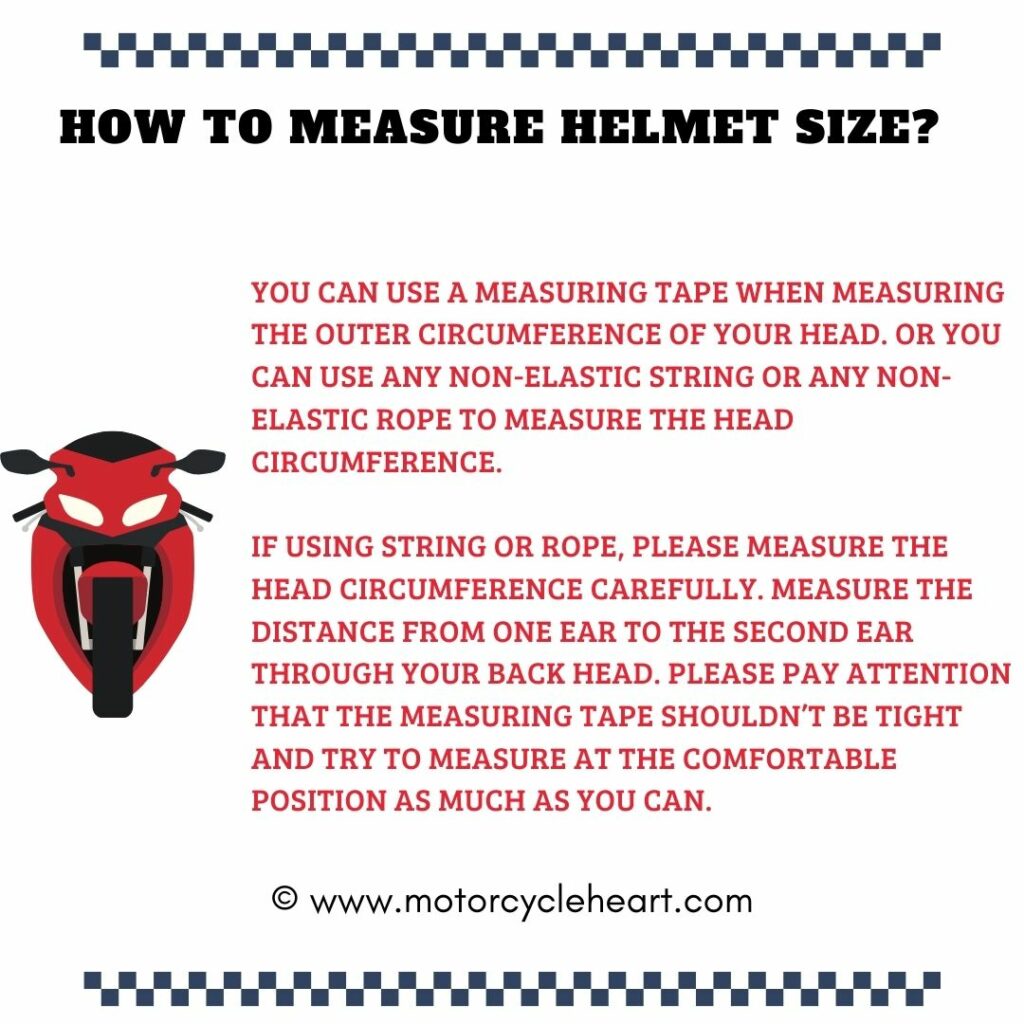
Take help from someone to identify the precise measurement of your head. Compare the results with the helmet’s sizing chart for determining the same length and type of helmet that suits your head well. The sizes can vary from XS, S, M, L, XL, XXL, XXXL
What size Helmet fits my head
| Size | Hat size (Inches) | Head circumference (Inches) |
| XS | 6 ⅝ -6 ¾ | 20 ⅞- 21 ¼ |
| S | 6 ⅞ – 7 | 21 ⅝- 22 |
| M | 7 ⅛ – 7 ¼ | 22 ½- 22 ⅞ |
| L | 7 ⅜ – 7 ½ | 23 1/4 – 23 ⅝ |
| XL | 7 ⅝ – 7 ¾ | 24 – 24 ⅜ |
| XXL | 7 ⅞ – 8 | 24 ¾ – 25 ⅛ |
| XXXL | 8⅛ – 8 ¼ | 25 ⅝ – 26 |
Don’t Buy Before You Try.
Once you know the type of helmet that fits well with your head shape and size, you can now shorten your search and get your hands on the helmet, which works well.
Before you put on the helmet, spread the straps, and glide your head into the helmet. They are not meant for being comfortable once your head passes on them through pads. You also need adjustment of your ears and focus on the perfect fitting of the helmet.
Check the Ideal Fit.
You must be wondering how you would feel. If you feel discomfort or soreness, then try another motorcycle helmet. Ordering a helmet could be tricky because some helmets have thick paddings, which can you uncomfortable initially. However, you’ll feel comfortable after a few rides. If you have determined your head size and shape correctly, you won’t be wrong about the helmet.
In case the helmet fits well, you might feel a cushioning effect over the cheeks. They feel slightly pushed up. However, open-facing helmets lack any cheek pads, which means you won’t experience such an effect.
Now pick up the helmet’s chin bar and slightly move around. The cheeks should also move but not your helmet. In the case of the helmet slides, you need to go one size down. If you feel the helmet is tight, bear in mind that helmet liners usually break 15-20% once you have ridden for 15-20 hours.
Wear Your Helmet For A Few Minutes.
Once you are done with trying, wear your helmet for around 15-30 minutes to ensure it works well for your head shape and size. Watch the TV shows while wearing your helmet. You are seeking the pressure points while wearing the helmet. Tightness should feel OK, but if you experience any pain, remove the helmet. This helmet is not ideal for you in such a case.
Discomfort might occur at your forehead or just over the temples. If you remove the helmet and see a red line on the forehead, try some other size. This means the helmet is no of the accurate long-oval size. If it’s squeezing the temples, it is not that round enough considering your face type.
Feels Right? Let’s Go Ride!
Wear the helmet at all times, making it comfortable for you while riding the bike. Spend some time wearing the helmet so that you can get used to the cushioning effect. The helmet eventually molds your head shape, offering a better fit.
Common Problems:
You’ll fac the following common issues if you don’t know how to measure for a motorbike helmet:
- Folding of ears once you put the helmet on. However, it’s completely normal. If you push the ears back in normal posture without even hurting the ears, you have opted for a suitable helmet.
- Unable to find out the correct head shape. Flatten the hair correctly and ask for help from your friend. If still, you are unable to find out, you can choose an intermediate oval.
- Some helmets come with extreme neck roll cushioning, holding the helmet using dual straps with thumbs pressing against your helmet. Now spread the opening of the helmet a little and pull it over the head. If still, the helmet does not fit, avoid forcing it and try an upgraded size.
- Wearing sunglasses or not does not affect the size of your helmet at most times. It’s because most helmets come with accommodation for the glasses.
How Much Is A Motorcycle Helmet?
Motorcycle helmets vary in terms of style and price. The full-face helmets come in a price range of $400-$4000. The modular helmets come in the price range of $150-$800. The open face helmets come in the price range of $300-$700. The half helmets come in the price range of $60-$200
FAQ about How to Measure for a Motorbike Helmet
What Happens If Your Helmet Is Too Big?
If the helmet is too large, it might loosen up and move here and there. Plus, it won’t be quiet and allow extreme entrance to the air.
Do Motorcycle Helmets Loosen Up?
Yes, the motorcycle helmets can loosen up over time because when you continuously wear them, this results in degradation and softening of the helmet’s cushioning pad.
Should A Motorcycle Helmet Squeeze Your Cheeks?
The motorcycle helmet can also squeeze the cheeks as it gives a pumped effect. The cushioned padding in the helmet results in a squeezing effect.
Conclusion
Now, after reading all about the motorbike helmet, you must have understood how to measure for a motorbike helmet correctly to gauge a fit. Choosing the right size with the most convenient features will make the motorbike helmet worth buying. Now that you know the entire process, you can have your hands on the best motorbike helmet.
Quick answer
How To Measure For A Motorbike Helmet Correctly: Here’s the short version: identify the likely cause(s), confirm with a simple check, then fix the easiest/highest-probability items first. If the issue affects braking, steering, tires, or fuel leaks, stop riding and inspect before the next ride.
Key questions (so you don’t waste time)
- Primary query: How To Measure For A Motorbike Helmet Correctly
- What tools/parts do you need before you start?
- What are the common failure points and how do you avoid them?
- How do you verify the fix worked (test/inspection checklist)?
At-a-glance guide
| Best first check | Tires/brakes/obvious leaks/loose fasteners |
| Best second check | Drive system tension/condition + electrical/battery |
| Stop riding if | Brake issues, steering wobble, tire damage, fuel leaks |
Step-by-step (practical)
- Confirm the symptom: reproduce it safely and note when it happens (cold/hot, RPM, speed, bumps, braking).
- Do the quick checks first: tire pressure/condition, chain/belt tension (if applicable), obvious leaks, loose fasteners, battery terminals.
- Isolate one variable: change one thing at a time (e.g., fuel, load, settings) and retest.
- Fix in a safe order: address safety-critical items first (brakes/tires/steering), then reliability items (charging/fueling), then comfort/noise.
- Verify: short test ride + post-ride inspection.
Checklist
- Tires: pressure, tread, age/cracks, punctures
- Brakes: lever feel, pad thickness, rotor condition, fluid level/leaks
- Drive: chain slack + lubrication (or belt condition)
- Controls: throttle free play, clutch free play, cable routing
- Electrical: battery voltage, terminals tight, main grounds
- Fluids: oil level, coolant (if liquid-cooled), fuel smell/leaks
Common mistakes
- Chasing “rare” causes first instead of checking the basics.
- Changing multiple things at once (you lose the diagnosis signal).
- Ignoring safety-critical symptoms (wobble, brake fade, fuel leaks).
- Over-tightening fasteners without a torque spec.
FAQ
Can I keep riding if this happens occasionally?
If it affects brakes, steering stability, tire integrity, or you smell fuel, don’t ride until inspected. For minor noise/vibration, do the checklist and monitor for change.
What’s the fastest way to narrow it down?
Reproduce the symptom, note the conditions, then do the “basics” checklist. Fix/confirm one item at a time.
What tools do I need?
At minimum: tire gauge, basic metric sockets/hex keys, flashlight, and a way to measure battery voltage. A service manual helps with torque values.
When should I go to a shop?
If you’re not confident with brakes/tires/steering, if a fix requires specialty tools, or if the symptom persists after basics.
How do I verify the fix?
Short ride close to home, then re-check: leaks, fasteners, tire pressure, brake feel, and that the symptom is gone.
Next steps (related guides)
Content refresh note: this post was updated to add an answer-first summary, a structured checklist, common mistakes, FAQ, and internal links for next steps.
Quick answer
How To Measure For A Motorbike Helmet Correctly: Start with the simplest, highest-likelihood checks first, then work outward. If anything affects brakes, steering, tires, or fuel leaks, stop and inspect before riding.
Primary checklist (do this in order)
- Confirm the symptom and reproduce it safely (short ride / stand test).
- Do the fast visual inspection (tires, chain/belt, controls, leaks).
- Measure/adjust the basics (pressures, slack, torque marks, free-play).
- Test again and document what changed.
Supporting questions (and the practical answers)
What tools/parts do you need before you start?
Answer it with a quick check first. If the quick check points to a component, inspect/adjust/replace in that order. Only move to deeper diagnostics after you’ve ruled out setup and wear items.
What are the common failure points and how do you avoid them?
Answer it with a quick check first. If the quick check points to a component, inspect/adjust/replace in that order. Only move to deeper diagnostics after you’ve ruled out setup and wear items.
How do you verify the fix worked (test/inspection checklist)?
Answer it with a quick check first. If the quick check points to a component, inspect/adjust/replace in that order. Only move to deeper diagnostics after you’ve ruled out setup and wear items.
Common mistakes
- Changing multiple variables at once (you can’t tell what fixed it).
- Ignoring tire pressure/condition (it causes a surprising number of “mystery” symptoms).
- Over-tightening fasteners instead of using specs/torque values.
- Skipping a post-fix test ride checklist (brakes, steering, lights).
FAQ
What’s the quickest way to how to measure for a motorbike helmet correctly?
Use the checklist above first. If the symptom affects safety-critical systems (brakes/steering/tires), don’t ride until it’s verified fixed.
What should you avoid when dealing with how to measure for a motorbike helmet correctly?
Use the checklist above first. If the symptom affects safety-critical systems (brakes/steering/tires), don’t ride until it’s verified fixed.
When should you stop and get a professional inspection?
Use the checklist above first. If the symptom affects safety-critical systems (brakes/steering/tires), don’t ride until it’s verified fixed.