How to fix motorcycle exhaust leak? The answer may seem complicated, but it’s really about fixing a few seals.
Of course, it’s not thatsimple. Fixing a motorcycle exhaust leak requires a lot of work. You must first identify the leak source and work your way into the muffler to seal it.
But before we dive into all that, how do you know if your exhaust is leaking? On a motorcycle, you will hear a distinct popping sound, followed by a strong petrol smell.
Motorcycle exhaust leaks are hazardous as they reduce the engine’s power output and can lead to backfiring. And if you can smell the odor while driving, you might even get carbon monoxide poisoning.
Not to worry, though. We have prepared a complete guide on fixing exhaust leaks on motorcycles and what you should know beforehand.
So, let’s get started!
How to Tell an Exhaust Leak?
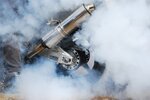
How do you tell if your exhaust leaks? Here are a few signs to watch out for:
- Your exhaust pipe is yellowing or bluing. This is a sign of excessive exhaust temperatures that first turn your pipe yellow and then blue.
- Explosions from the exhaust. This is due to some of the air/fuel mixture escaping from the exhaust.
- Your exhaust has become a lot noisier.
- Popping sound when shifting down and assisting brakes with the engine.
- A strange and strong odor coming from the exhaust. It indicates burnt-up fuel and is caused by an exhaust leak.
Causes of A Motorcycle Exhaust Leak:
Now you know how to tell if your exhaust is leaking, but what causes it? A range of problems could be the culprit, including:
Loose Exhaust Bolts:

The number one cause for a leaky exhaust is an exhaust bolt that has gone loose. Normally, these shouldn’t come loose unless they’re rusted. So, you’ll need to replace them. You can still tighten the screws even if they seem fine.
Faulty Gaskets:
Gaskets are what create an airtight seal between the header and the engine. You’ll want to check up on the gasket and look for any looseness, deformities, or corrosion. You might not even have one in the first place.
Corrosion:
Finally, the least likely cause of a leak is corrosion. Corrosion near the exhaust and headers, can lead to the exhaust leaking. If it’s just a bit of rust, you can remove it easily. But more profound structural damage will warrant expensive repairs.
Is an Exhaust Leak Bad for My Motorcycle?
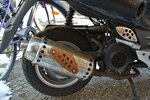
Exhaust is made to remove unwanted gasses. Hence, a leak should be beneficial since it helps more of the gasses get out. Well, not really.
You see, the exhaust plays a crucial role in engine power. If the exhaust is leaking, more unburnt fuel and air mixture are being let out through the exhaust. This mixture will burn up in the exhaust, and we would want it to burn up inside the engine.
This leads to what we call a “lean” engine. The cylinder with the leak will be running with lesser fuel while the other cylinders will normally be running. This creates an imbalance, leading to a horde of problems, such as vibrations and a hanging idle.
Moreover, there is a period during which both the intake and the exhaust valve are open. To prevent this from happening, the exhaust creates a vacuum that quickly shuts the intake valve. However, if the exhaust is leaky, the back pressure won’t be significant enough to do this.
And that’s not to mention why exhaust leaks happen in the first place. If your exhaust is leaking due to corrosion or warping of the manifold, this will lead to other later problems. And corrosion is never a good thing to have on an engine.
How To Fix Motorcycle Exhaust Leak:
Now that you know everything about exhaust leaks, it’s time to fix them. Here’s how to fix motorcycle exhaust leak without professional help:
Step 1: Identify the Leak
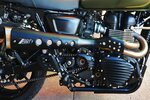
The first step of how to fix motorcycle exhaust leak is to identify whether your exhaust is leak or not. This should be easy, considering we already laid out the leak symptoms a few paragraphs above.
In a nutshell, look for a visible leak in the pipe. If there is some unburnt fuel leaving the system, you’ll immediately notice it leaking from the pipe.
However, in most cases, the fuel will burn up and create popping sounds. You may also be able to smell unburnt fuel. And the extra heat from the combustion will first lead to a yellow tinge on your pipe and then a blue one. This should indicate that your exhaust is leaking.
Step 2: Preparations
Before you begin handling your bike’s engine, it’s essential to pay attention to some safety precautions.
First, make sure the engine has been turned off for a few hours. Engines get very hot. You don’t want to burn yourself, even if you’re handling the exhaust pipe or the headers.
Secondly, if you’re going to be working with chemicals, wear the correct safety equipment. And no, not just gloves; wear safety glasses as well to keep your eyes safe. Tie back your hair to keep it from getting caught among the components.
Step 3: Remove the Exhaust Pipe
Once you’re prepared, start by removing the exhaust pipe. Repairs are a lot easier when the pipe is off.
First, slide the plate or the paneling to get better access to the exhaust pipe. Then, remove the muffler by unscrewing it from the mount.
Next, remove the pipe mounts. You’ll need to find the correct tool for this as each mount is different. But a socket should do the trick.
Lastly, pull out the pipe springs. It’s best to use a designated spring puller for the job. Avoid using pliers and similar instruments as they can be damaging to the system. This should easily remove the rest of the pipe.
While you’re at it, inspect the connection points as well as the muffler as a whole. Look for leaks and holes that could be the culprit. Have them sealed or repaired by a professional.
Step 4: Inspect the Seals and O-Rings
Once the pipe has been removed, inspect the O-rings and the seals. If you don’t know, O-rings are made of rubber that sits between two junctions and creates an airtight seal.
The problem with the seals and O-rings is your engine uses a lot of them. Thus, pinpointing exactly which seal has failed will be a challenging task. Begin by inspecting the seals that connect the exhaust pipe with the cylinder. This is the common location for seal failure.
If you find the seal has been misaligned, align it back to the right position. Moreover, If the seal is warped, replace it and if it is broken, try sealing it with a heat-resistant sealant. Or you can always return it.
Aside from the seal, you should also inspect the pipe mount. If the mount is not in the correct position, it may allow the pipe to wiggle around. Check if the mount is broken, and if it is, replace it.
Similarly, inspect the pipe springs. Recall how the mount keeps the pipe in place. The spring allows it to move about just a little to absorb tension and shock. Misaligned or broken springs can lead to improper positioning of the pipe.
Step 5: Replace Damaged Components
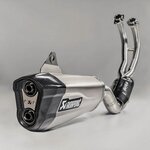
If the gaskets, seals, or the O-rings are damaged, you’ll need to replace them. While you can use sealant, they’re still not very expensive to replace.
While you’re at it, clean the general area around the seal/O-ring. If there is corrosion around that area, use any suitable method to remove it. If it’s rust, for instance, you can make a solution of water and vinegar to clean it up.
Inspect the area underneath the damaged parts as these can sometimes also succumb to deforming. If that’s the case, you’ll be looking at more expensive repairs.
Before placing the new seals, be sure to wipe the area down to remove any dust and debris. Debris will only interfere with the sealing capabilities of the seals. So, spare no expense at removing it.
Also, replace the mounts and springs at this point. It’s better to dive deeper into your exhaust and find out what you need to replace, and substitute it all in one go.
In rare cases, you may need to change the entire exhaust, including the pipe. If your pipe is starting to blue, it means your engine is running lean, but the pipe itself should be fine. You won’t need to replace it unless it’s completely broken.
Step 6: Put Everything Back Together
Once you’re done replacing everything, put it all back together. Work your way backward. First, put back any gaskets, seals, and O-rings you may have removed. Tighten any seals and place the exhaust spring and mount back in their positions.
Next, mount the muffler into the exhaust mount and carefully screw it. Then, put back any paneling or plating you may have removed to get better access to the exhaust.
Finally, give your bike a test ride. If the same problems persist (popping, leaking, bluing, etc.), you should consult a professional. Perhaps the problem is not a leak. Or maybe you didn’t identify the source of the leak correctly.
Will An Exhaust Leak Hurt My Motorcycle?
Yes, and in more ways than you can think. An exhaust leak will lead to what is called a lean-running engine.
An engine that’s running lean is not running on enough fuel. When unburnt fuel leaks through the exhaust, there isn’t enough in the cylinder. This leads to either an imbalance in power (if the leak is in one cylinder) or an utterly lean engine (if all cylinders are leaky).
Lean engines have their list of problems. They vibrate heavily, especially when idling. They lead to a loss of power and fuel efficiency. And worst of all, they can degrade over time and get destroyed permanently.
In addition to that, motorcycle exhaust leaks may also result in carbon monoxide poisoning. It’s not as likely as in a car, though. But you cannot simply neglect it, especially if you can smell the exhaust while driving.
If you know how to fix motorcycle exhaust leak, however, you can avoid all that and keep your motorcycle in top shape.
FAQ
What Does A Motorcycle Exhaust Leakage Sound Like?
An exhaust leak will sound much like a pop coming from your engine. The popping sound is often misattributed to tapping valves, but it’s not the same.
Are Exhaust Leaks Expensive to Fix?
If you’re fixing them yourself, the best-case scenario is that you spend a few bucks on seals. And the worst is that you need to replace major components. If done by a professional, labor costs can go as high as $125 to $300.
Can You Use Flex Seal on The Exhaust?
Yes, Flex Tape is an excellent choice for sealing damaged areas in your exhaust and manifold. It’s quite durable and doesn’t come off even under intense pressure.
How Long Can You Drive with An Exhaust Leak?
Exhaust leaks generate a lot of noise, so you can only drive as long as the noise is within legal limits. If the leak is just near the muffler, you don’t need to repair it immediately. If you can smell the exhaust gasses while driving, you should immediately repair the leak, as it could cause carbon monoxide poisoning.
What Does A Leaking Exhaust Sound Like?
A leaking exhaust will make a sound like a pop. It’ll usually occur while you’re driving.
Is It Okay to Drive with An Exhaust Leak?
It is okay to drive with an exhaust leak on a motorcycle as long as the gasses aren’t coming your way. However, if the leak is too big, it can’t be left unattended. Your engine will eventually deteriorate, and your exhaust pipe can damage.
Will an Exhaust Leak Affect Loss of Power?
Unburnt fuel leaking out from the engine will most definitely result in a loss of power. Moreover, the lack of backpressure will lead to the valve overlapping.
Conclusion
Exhaust leaks can be scary. But with the proper knowledge and the right tools, it’s nothing shy of an easy repair.
Knowing how to fix motorcycle exhaust leak isn’t enough, though. You need to apply that knowledge and be brave enough to take up the job yourself. You could end up spending hundreds in labor costs if you hire a professional. And that’s excluding material costs.
Now that you know all about fixing exhaust leaks, it’s time to put your knowledge to the test! Make sure all the seals are tight. And remember safety first!

