
While a rumbling V-twin in any Harley gets the grins going, without anything to transfer all that power and torque to the rear wheels, you won’t be going anywhere. Harley Davidson made the gradual transition from chains to belts in the early 1980s, with the 1980 FXB Sturgis setting the trend for all bikes down the road. Except for the Pan America 1250 (even the electric LiveWire deploys a belt), belts were well suited to the increases in power in the new engines and a far cry from the first iterations seen more than a century ago.
Belts were no longer limited to low-powered or one-off bikes as technology poured into material advances, and the industry gradually caught on. So, how do belts compare to chain and shaft drives, and is the trend set by Harley Davidson final drive belts the best drive option in cruisers, bobbers and tourers?
Why Have a Belt Drive?
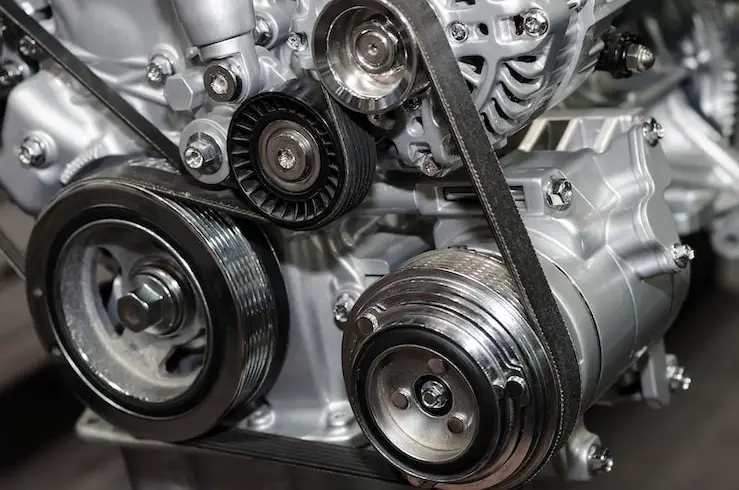
The advantages of belts compared to chains and shafts have led many riders to opt for belt conversion kits. Final belt drive systems essentially consist of a pair of pulleys, one from the gearing and the other driving the rear wheel, connected by a belt. The setup allows for the effortless transition of power, makes good use of the V-twin’s large displacement and plentiful low-down torque and is extremely quiet. These are not the only benefits, though.
Less Maintenance
Harley rates its belts for over 100 thousand miles, albeit with good maintenance. Belts provide safer riding and less downtime than chains, which must be replaced every 30 thousand miles at most. You won’t have to worry about lubrication, messy oil stains, or chain rollers rusting due to rain or road debris.
In addition, with fewer parts, fewer things can or will go wrong. And the belt won’t require adjusting every few hundred miles regardless of where or how you ride. In the same context, a belt won’t run as hot as a chain, and when made of the right materials, it will endure less wear. With the regular inspection of the condition of belts during service intervals (every 5000 miles), the belt will be one of the last parts that need replacing.
Smooth and Quiet Operation
Belts are what’s exactly needed for the low-down grunt that V-twins make. You won’t be revving your Harley to the insane redlines seen on sports bikes. Instead, “cruising” implies a steady and smooth power delivery. Unlike chains, belts won’t slip, produce vibrations, or jolt the bike into an uncontrolled frenzy. And if they do fail, they won’t cause catastrophic engine failure.
Except for shaft-drive motorcycles, belt drives come in as the quietest. There’s less friction as with chains and sprockets and no grinding noises from the back wheel. Related is the lower weight of a belt compared to a chain and especially the extra weight in shaft-driven motorcycles.
Are There Any Cons That Need Mentioning?
While this is the best option for the riding Harleys is known for, it’s not all roses. Belt-drive systems are on par with shaft drives in terms of complexity and production costs. They require larger pulleys front and back to get the gearing ratios right, and this means more space, something that, incidentally, isn’t lacking in bigger bikes like Harleys.
What’s more of an issue is power loss, as belts aren’t as efficient as chains in this respect. They can’t wrap around the pulleys as tightly as chains do around sprockets and will experience between 10 to 15 per cent power loss. Belt-driven systems do, however, fare better than shaft drives (which will lose up to 25 per cent of available power).
Lastly, if a belt is missing more than a few teeth, is cracked, damaged, or swollen, replacing it means much more work. And even though this may be just once (unlike the frequent chain swaps and repairs), you’ll want it done in a bike garage, especially if you’re clueless about basic bike tools.
Signs of a Failing Belt and Common Issues
Belt Tension
The right belt tension means it won’t be sitting too loose or too tight on the pulley. You can check this with a simple tensioner gauge, and the belt sprung to the recommended tension that Harley states for each of its bikes. An HD belt that’s too loose can start to slip, meaning heat buildup due to friction increases. You’ll feel this with a gradual change and loss of power. This is also the reason for subsequent cracks and tears and squealing noises on startup.
Adversely, any Harley Davidson final drive belts that are too tight can damage the pulleys, transmission and engine parts. Look for premature signs of wear, such as missing teeth, sidewall damage, stone damage, and any bigger cracks along the length or width of the belt. Also take note of the overall appearance of the belt, as a hardened belt drive is one close to snapping.
Misalignment
Belts that aren’t aligned with the pulleys will wear out sooner, cause more vibrations than usual, and are the cause of riding instability. Check that pulleys and shafts are sitting on the same plane and are parallel to each other to avoid misalignment issues.
Outside Factors – While belts are built to last, longer exposure to high heat, humidity, excess dirt or gravel can cause belts to buckle. Remove any buildup with a simple clean before this causes further damage to belts, pulleys and other drivetrain parts.
Finding a Replacement Belt
If the belt drive on your Harley is nearing its replacement due date or shows signs of advanced wear, finding the right replacement belt is simple. Pay attention to the materials the belt is made of, as this will impact both durability and performance.
Here, there are different proprietary choices, but most belts are made of synthetic rubber with inner steel wire reinforcement and Kevlar or carbon fibre backed outers. The materials exhibit high tensile strength, while still allowing for flex. The specific tooth designs mean they’ll go through less wear. And the puncture-resistant outers null any potential damage from rocks and road debris.
Besides materials, buyers need to be aware of the tooth count and width of the belt so it can fit the specific bike, Harley has drive belt size charts that list the number of teeth, how wide each belt is and the pulleys on which they’re to be installed. As an example, all Softail models produced between 2018 and 2020, will require belts that are 24mm wide, have 134 individual teeth and go on 32/66 pulleys. Or you can simply take your worn belt drive to your nearest Harley dealer or aftermarket Harley specialist store to get what you need.
Quick answer
A Guide to Harley Davidson Final Belt Drives: Here’s the short version: identify the likely cause(s), confirm with a simple check, then fix the easiest/highest-probability items first. If the issue affects braking, steering, tires, or fuel leaks, stop riding and inspect before the next ride.
Related reading you may want open in another tab: Moto Guzzi California Vs. Harley Davidson Road Glide.
Key questions (so you don’t waste time)
- Primary query: A Guide to Harley Davidson Final Belt Drives
- What does this mean in plain English (quick definition)?
- When is it a problem vs. normal?
- What should you do next (practical steps)?
At-a-glance guide
| Best first check | Tires/brakes/obvious leaks/loose fasteners |
| Best second check | Drive system tension/condition + electrical/battery |
| Stop riding if | Brake issues, steering wobble, tire damage, fuel leaks |
Step-by-step (practical)
- Confirm the symptom: reproduce it safely and note when it happens (cold/hot, RPM, speed, bumps, braking).
- Do the quick checks first: tire pressure/condition, chain/belt tension (if applicable), obvious leaks, loose fasteners, battery terminals.
- Isolate one variable: change one thing at a time (e.g., fuel, load, settings) and retest.
- Fix in a safe order: address safety-critical items first (brakes/tires/steering), then reliability items (charging/fueling), then comfort/noise.
- Verify: short test ride + post-ride inspection.
Checklist
- Tires: pressure, tread, age/cracks, punctures
- Brakes: lever feel, pad thickness, rotor condition, fluid level/leaks
- Drive: chain slack + lubrication (or belt condition)
- Controls: throttle free play, clutch free play, cable routing
- Electrical: battery voltage, terminals tight, main grounds
- Fluids: oil level, coolant (if liquid-cooled), fuel smell/leaks
Common mistakes
- Chasing “rare” causes first instead of checking the basics.
- Changing multiple things at once (you lose the diagnosis signal).
- Ignoring safety-critical symptoms (wobble, brake fade, fuel leaks).
- Over-tightening fasteners without a torque spec.
FAQ
Can I keep riding if this happens occasionally?
If it affects brakes, steering stability, tire integrity, or you smell fuel, don’t ride until inspected. For minor noise/vibration, do the checklist and monitor for change. See also: Moto Guzzi California Vs. Harley Davidson Road Glide.
What’s the fastest way to narrow it down?
Reproduce the symptom, note the conditions, then do the “basics” checklist. Fix/confirm one item at a time. See also: Moto Guzzi California Vs. Harley Davidson Road Glide.
What tools do I need?
At minimum: tire gauge, basic metric sockets/hex keys, flashlight, and a way to measure battery voltage. A service manual helps with torque values. See also: Moto Guzzi California Vs. Harley Davidson Road Glide.
When should I go to a shop?
If you’re not confident with brakes/tires/steering, if a fix requires specialty tools, or if the symptom persists after basics. See also: Moto Guzzi California Vs. Harley Davidson Road Glide.
How do I verify the fix?
Short ride close to home, then re-check: leaks, fasteners, tire pressure, brake feel, and that the symptom is gone. See also: Moto Guzzi California Vs. Harley Davidson Road Glide.
Next steps (related guides)
- Moto Guzzi California Vs. Harley Davidson Road Glide — how it differs from “A Guide to Harley Davidson Final Belt Drives”
Content refresh note: this post was updated to add an answer-first summary, a structured checklist, common mistakes, FAQ, and internal links for next steps.